Metronomics Manual
Welcome to the Metronomics! This manual details many of the features available in the app. If you would prefer
to learn via watching rather than reading, please visit the Metronomics
YouTube channel.

I created Metronomics out of necessity. The metronome I was using was functional, but it let me be
complacent about time — I became reliant on it to tell me where the time was instead of
helping me build my own sense of rhythm. The features in Metronomics are all built with the goal of helping
musicians develop a good sense of time and rhythmic security, without leaning on a constantly-clicking
metronome as a crutch.
- John Nastos
Saxophonist, creator and programmer of Metronomics
The metronome can be started and stopped using the button near the bottom of the main metronome screen.
When playing in the background, the metronome can also be started and stopped using the on-screen "Now
playing" controls on the lock screen of your device.
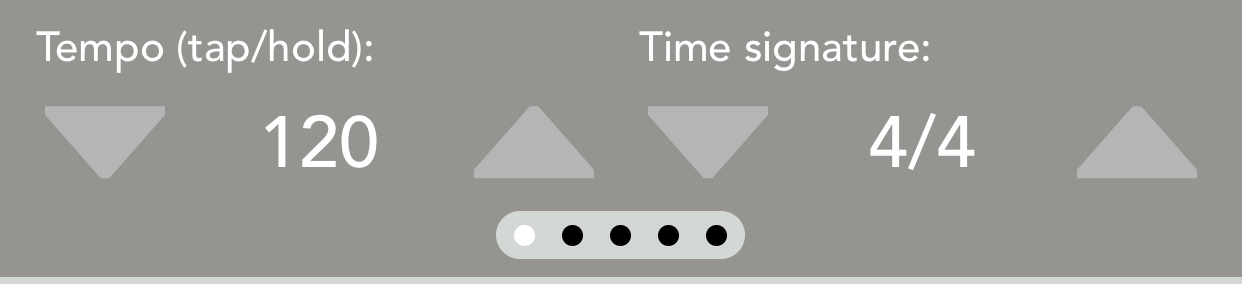
Near the top of the screen, just below the "visual metronome" that displays the time signature in a series
of blue boxes, is Metronomics' control row. This is a series of controls, each made up of up and down arrow
buttons, plus a label in the middle. Each of these controls can be manipulated by the up/down arrow buttons
as well as by tapping the middle label, which opens up a dialog box allowing you to type in a value.
Certain controls also have other methods of manipulation, like the
tempo control, which will also respond to the up/down arrows being held down in a long press.
It is important to note that only two controls are displayed on the screen at any one time, but more can be
revealed by swiping left/right on the control row. The "page indicator" dots below the row give a visual
cue as to what page of controls you are currently on.
Tapping the up/down arrows on the tempo control increases or decreases the tempo by 1 bpm. Tapping and
holding those buttons increments the tempo by +/- 10 bpm.
Tap and hold the tempo control label (the tempo number between the up/down arrows) to open a dialog box
that will allow you to type in a tempo.
By tapping the tempo control label repeatedly, you can enable the "tap tempo feature." Metronomics will
translate the tempo that you tap into a bpm value for the metronome.
Tapping the up/down arrows on the time signature control increases or decreases the time signature by 1
beat.
Tap and hold the time signature control label to open a dialog box
that will allow you to type in a time signature.
Tap the time signature label once (do not hold) to bring up the time signature control window. Here, you
can choose from common time signatures or a custom time signature.
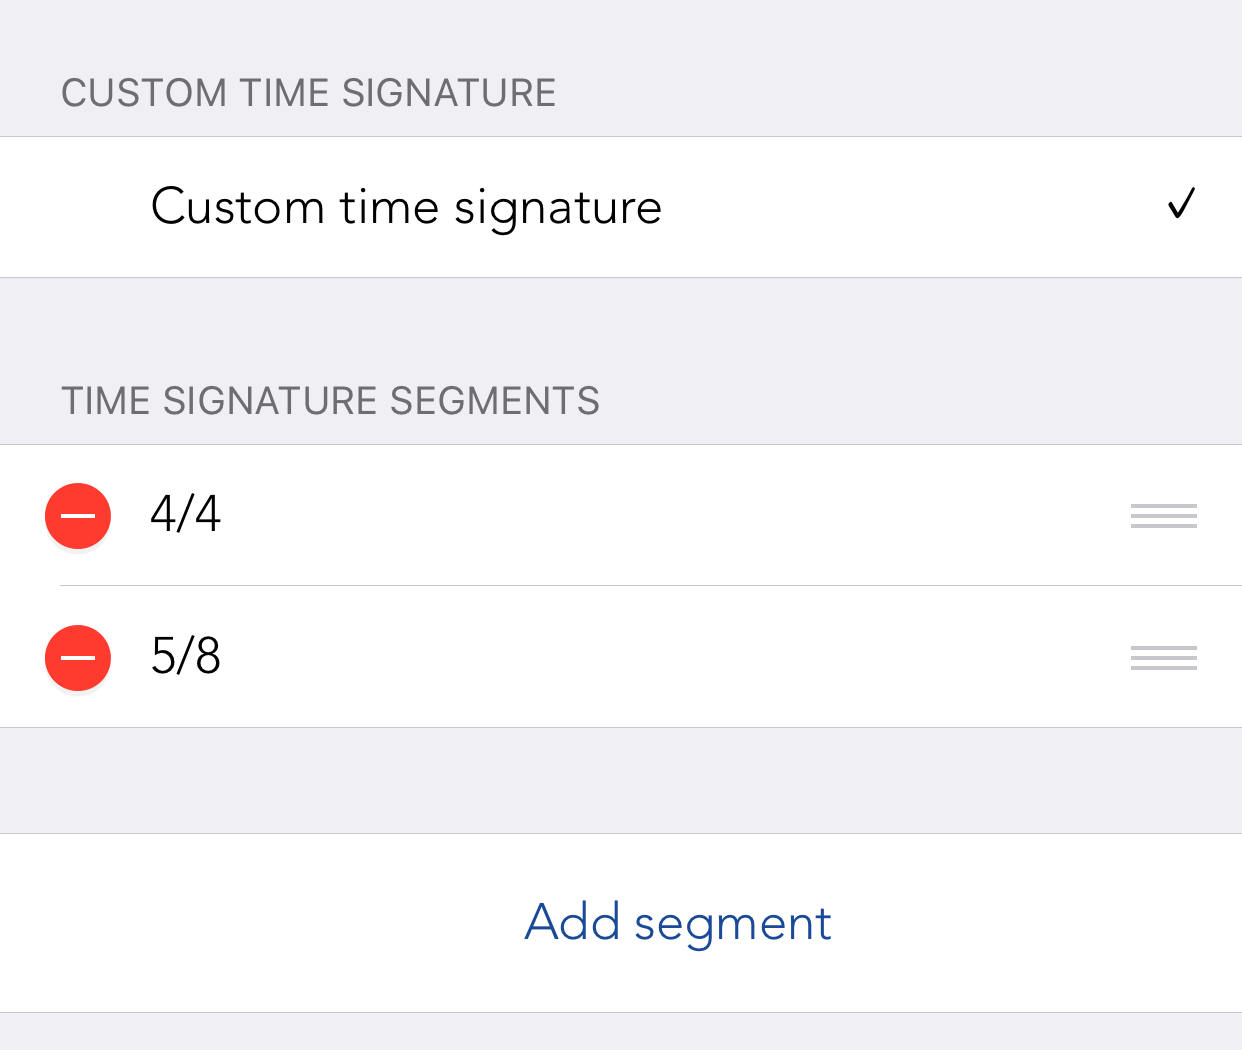
Compound meters can be created by combining "segments" (eg. 4/4 + 3/8 + 3/4). Segments can be added,
deleted, and rearranged using this control.
This control determines how often the "downbeat" (eg. beat 1) is played by the metronome. For example, a
value of 1 will make the metronome play the downbeat sound every bar. 0 will not play the downbeat at all
and 2 will make the downbeat play every other bar.
When a subdivision has a probability other than 100%, the pattern that is played in each bar is determined
randomly by the metronome. Using this control, you can have that pattern repeated. Be aware that if the
subdivision has a sequence length that isn't equal to the length of the bar, this feature may behave in
unexpected ways.
The "Audible for __ bars" and "Inaudible for __ bars" controls work together to determine which bars of a
metronome are played and which are silenced. The default is to have "All" bars audible and 0 bars
inaudible. Setting both of these controls to 1 would make the metronome alternate between audible and
silent bars.
Tap and hold either of these controls to enable random audility. In this mode, the chances that a bar is
audible is determined by a % probability, much like the subdivisions' probabilities.
Using these controls, you can have the metronome speed up or slow down by X bpm every Y bars.
Use this control to have the metronome play a countoff before the main pattern begins. The countoff is
played with only the downbeat sound and is displayed overlayed on the normal metronome screen while in
progress.
Using this control, you can set Metronomics to play for a certain amount of minutes and seconds before
ending automatically. While enabled and playing, this control will display the remaining duration on the
timer.
Each metronome is made up of a collection of subdivisions, plus a "downbeat" (the downbeat only gets played
on beat one of the bar). The subdivisions are represented on the main metronome screen by a collection of
columns, each with a circular button with a subdivision icon, a slider, and a knob control.
By default, the slider controls the probability that a subdivision will occur. For example, at full
probability, a subdivision will always be played. At half probability, the subdivision will get played
roughly 50% of the time.
The knob at the bottom of the screen controls the subdivision's volume by default. However, the role of the
slider and knob can be reversed on the settings page.
By tapping the circular icon above the slider, you can enter the subdivision settings page. This page gives
you many options to change and refine the behavior of the subdivision.
To add a subdivision, tap the "Add Subdivision" button on the main metronome screen. This brings up a
window that allows you to choose from common subdivisions, a collection of preset rhythms (including common
clave patterns), and custom subdivisions. You can also choose a sound for the subdivision (which can be
later changed in the subdivision's settings window).
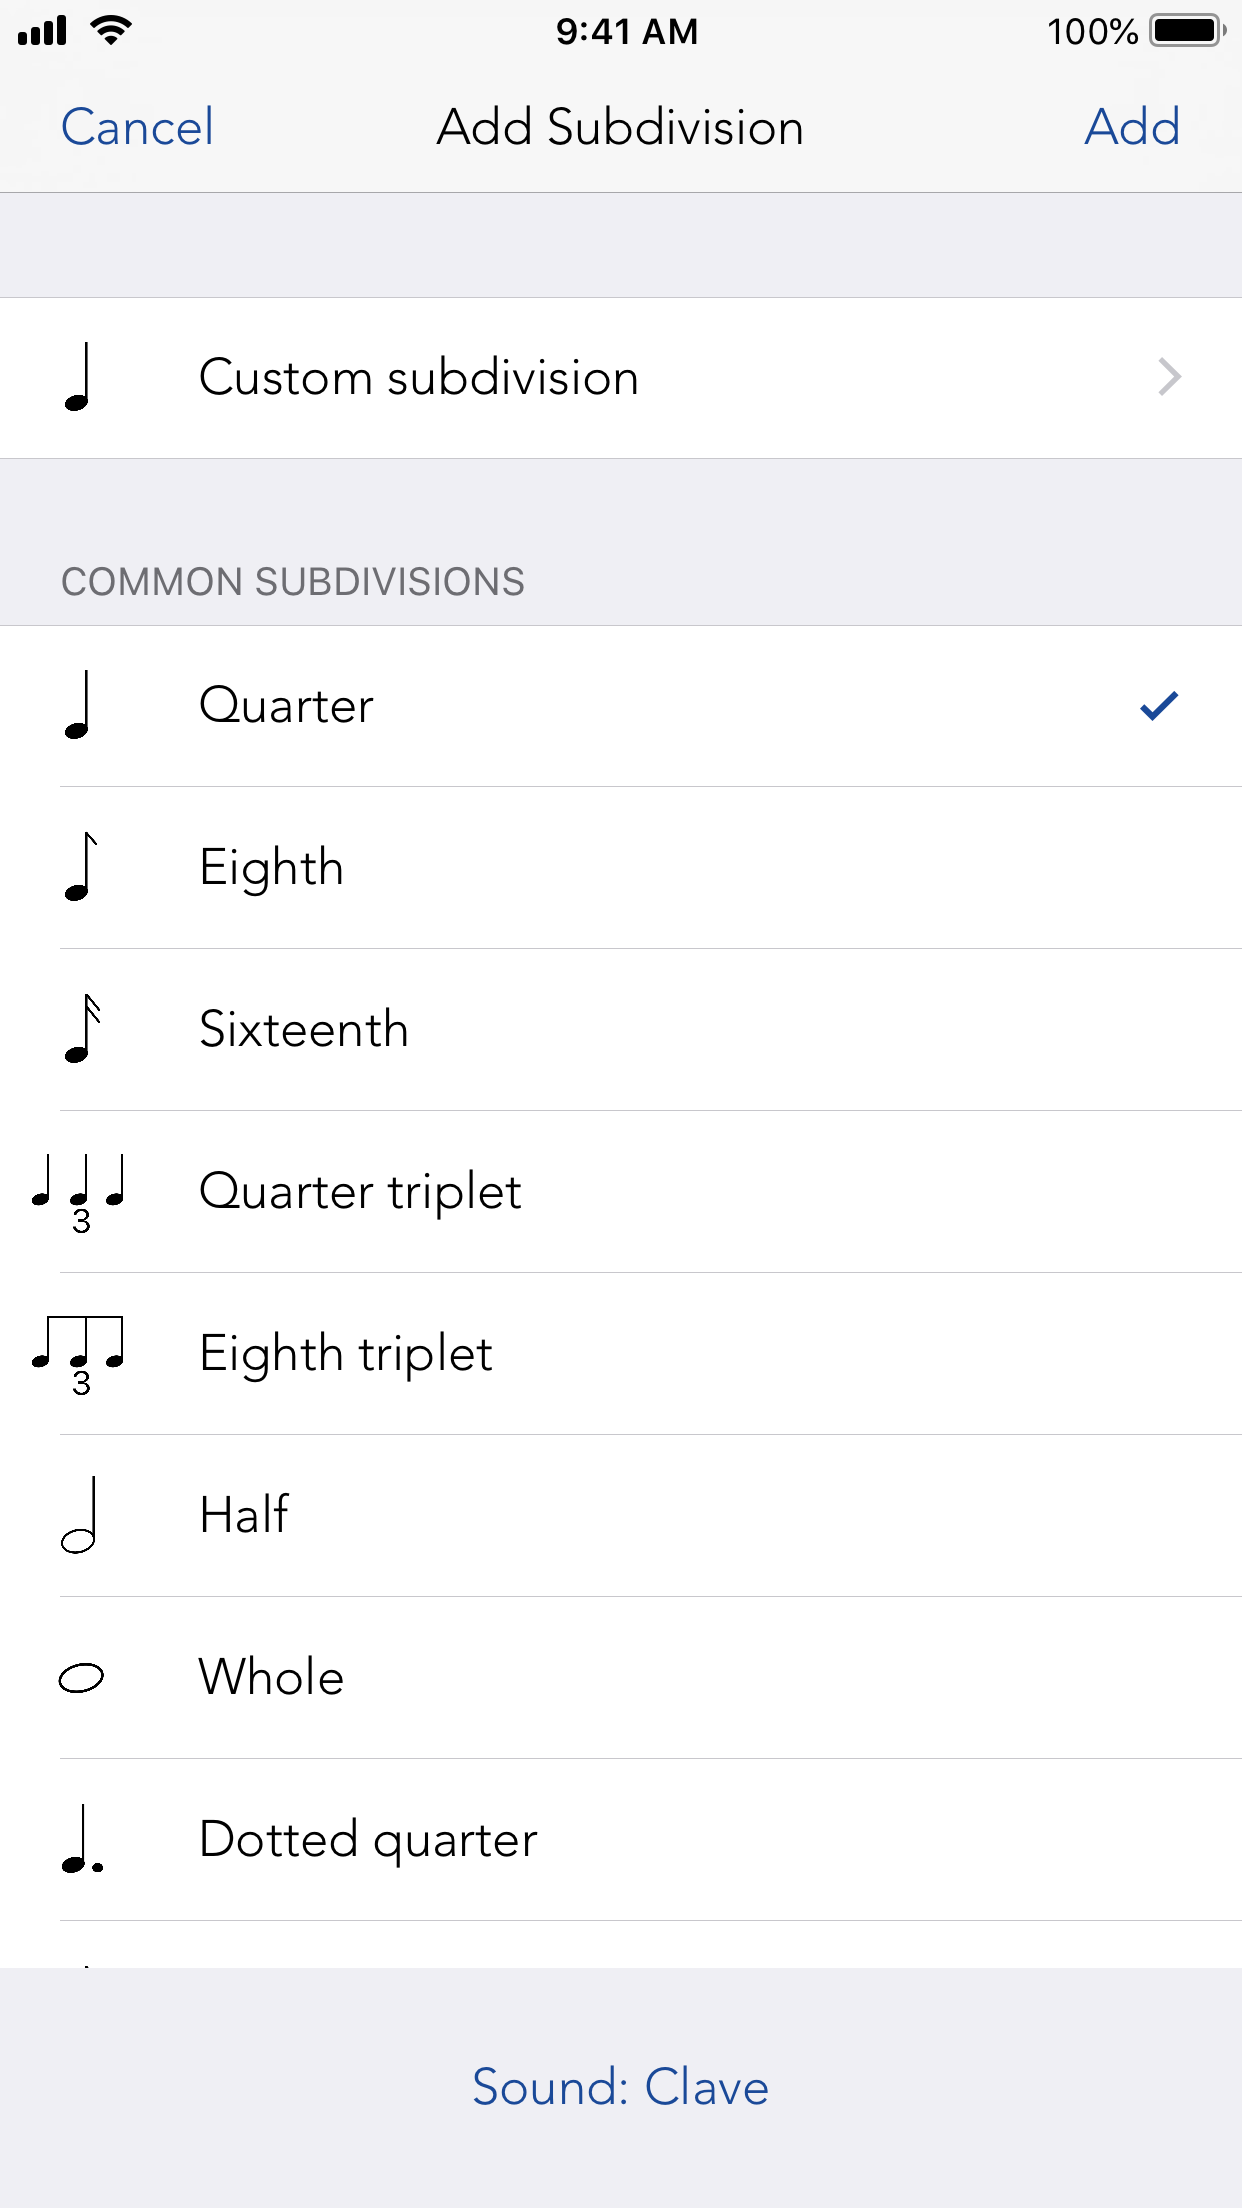
If you have chosen "Custom subdivision," you will be asked to choose a duration for the subdivision. This
is in the format numerator/denominator where the numerator is the number of times that a subdivision occurs
and the denominator is the number of beats that it takes for the numerator to complete. For example: 1/1 is
quarter notes (one subdivision per one beat). 2/1 is eighth notes (two subdivisions per one beat). 3/2 is
quarter note triplets (three subdivisions per two beats).
There is also a special subdivision called "Every beat." The subdivision plays on each beat, regardless of
the time signature. This is not a traditional subdivision, since it's duration can change depending on the
denominator of the time signature. For example, in 4/4, this subdivision will be the equivalent of quarter
notes. However, in 4/4 + 3/8, it will be quarter notes for the 4/4 section, then switch to eighth notes for
the 3/8 section. Note: these subdivisions cannot be sequenced.
To remove a subdivision, open the subdivision settings window by tapping the subdivision info button (the
circle above the slider on the main screen), scroll to the bottom of the table, and choose "Remove
subdivision."

To access this page, tap the circular icon above the slider for the subdivision on the main metronome
screen. Depending on the subdivision, certain options may or may not be displayed. For example, the options
for a quarter note subdivision won't include swing, which is only available to subdivisions with
even-numbered numerators.
- Probability: use the slider here to control the probability, just
like the slider on the main metronome
screen
- Volume: from here, you can control the volume of the subdivision.
You can also enable "volume
variation," which will choose a random volume for the subdivision each time it is played, within the
range determined by the options you set.
-
Subdivision type: choose "Sound" or "MIDI" -- MIDI options are
discussed later in the manual. You can
also change the sound of the subdivision.
- Sequencer: see below
- Duration: the duration of the subdivision. This
is in the format numerator/denominator where the numerator is the number of times that a subdivision
occurs
and the denominator is the number of beats that it takes for the numerator to complete. For example:
1/1 is
quarter notes (one subdivision per one beat). 2/1 is eighth notes (two subdivisions per one beat). 3/2
is
quarter note triplets (three subdivisions per two beats).
- Offset: using this control, you can have the subdivision start in a
different place than the default
beginning of the measure. For example, normally if you have a subdivision with quarter note triplets,
these will start on beat one, and you wouldn't be able to practice them starting on beat 2. However, by
using the offset setting, you could set the offset to 1/1 (one quarter note), and the pattern would
start on beat 2.
- Swing: subdivisions with an even numerator can be set to swing. The
slider determines the effect of the
swing -- 100% is equivalent to a 2/3:1/3 relationship. In other words, if an eighth note subdivision is
set to swing at 100%, it will sound like two eighth note triplets tied together, follwed by one eighth
note triplet. Use the "Match swing amount" button to match the subdivision's swing amount to the other
subdivisions with swing enabled.
Subdivisions (excluding downbeats and the special "every beat" subdivisions) can be sequenced. This means
that a specific pattern can be played using the subdivision. For example, if you wanted to play only beats
2 and 4 in 4/4, you could use quarter notes and then enable the sequencer, choosing only to play beats 2
and 4.
The sequencer view is layed out with three rows of rectangles. The top row represents measures. The middle
row represents beats. Finally, the bottom row represents individual subdivisions. The individual
subdivisions in the bottom row can be activated so that the metronome plays them by tapping them. Activated
subdivisions are red while inactive subdivisions are light gray. By default when the sequencer is first
turned on, all individual subdivisions are in an inactive state.
If the metronome is playing while you have the sequencer displayed, the subdivision currently being played
will be green, regardless of its active/inactive state.
The sequencer has two options:
- The sequencer length
- The sequence repeat type
The sequence length describes the length of the sequenced pattern, represented in subdivisions. When the
sequencer is first turned on, this should be the number of subdivisions that fit into a bar. For example, a
sequence of quarter notes that takes up 1 measure of 4/4 should have a sequence length of 4. If you wanted
a sequenced pattern that is 8 beats long, but wanted to keep the time signature for the metronome the same,
you could change the sequence length to 8. Sequence lengths do not need to divide evenly into the time
signature — if they do not divide evenly, their behavior is determined by the next option.
Consider the example of an 8th note subdivision with a sequence length of 5 in a time signature of 4/4. Of
course, 5/8 does not evenly fit into 4/4. If the repeat type is set to "No repeat," the sequence will get
played once within the bar of 4/4, followed by silence for the rest of the bar. If it is set to "Cutoff,"
the sequence will be played once in its entirety, plus the first 3 eighth notes of the sequence, filling up
the entire bar of 4/4. At that point, the sequence will get reset again, even though it is only part way
through its iteration. Finally, if the sequence is set to "Loop," the 5-note sequence will play repeatedly,
regardless of where in the bar of 4/4 it lands — the sequence will always play in its entirety.
If you have a Metronomics Pro subscription, you can enable MIDI subdivisions. Once a subdivision is set to
MIDI rather than sound, you are given three options, allowing you to choose a MIDI destination, channel,
and program number. Channel and program number should be self explantory for MIDI users. Destination
determines whether the subdivision should be played by the internal MIDI synthesizer within Metronomics or
sent to an external app. If you choose to send the signal to an external app, make sure you set up the
external app to accept MIDI input from Metronomics' MIDI port.
In MIDI mode, the sequencer turns into a specialized MIDI sequencer. In some ways, it behaves the same as
the normal sequencer. However, when you tap on a subdivision, instead of just activating the subdivision,
an additional window opens up that allows you to choose what MIDI information is sent. This window has the
following controls:
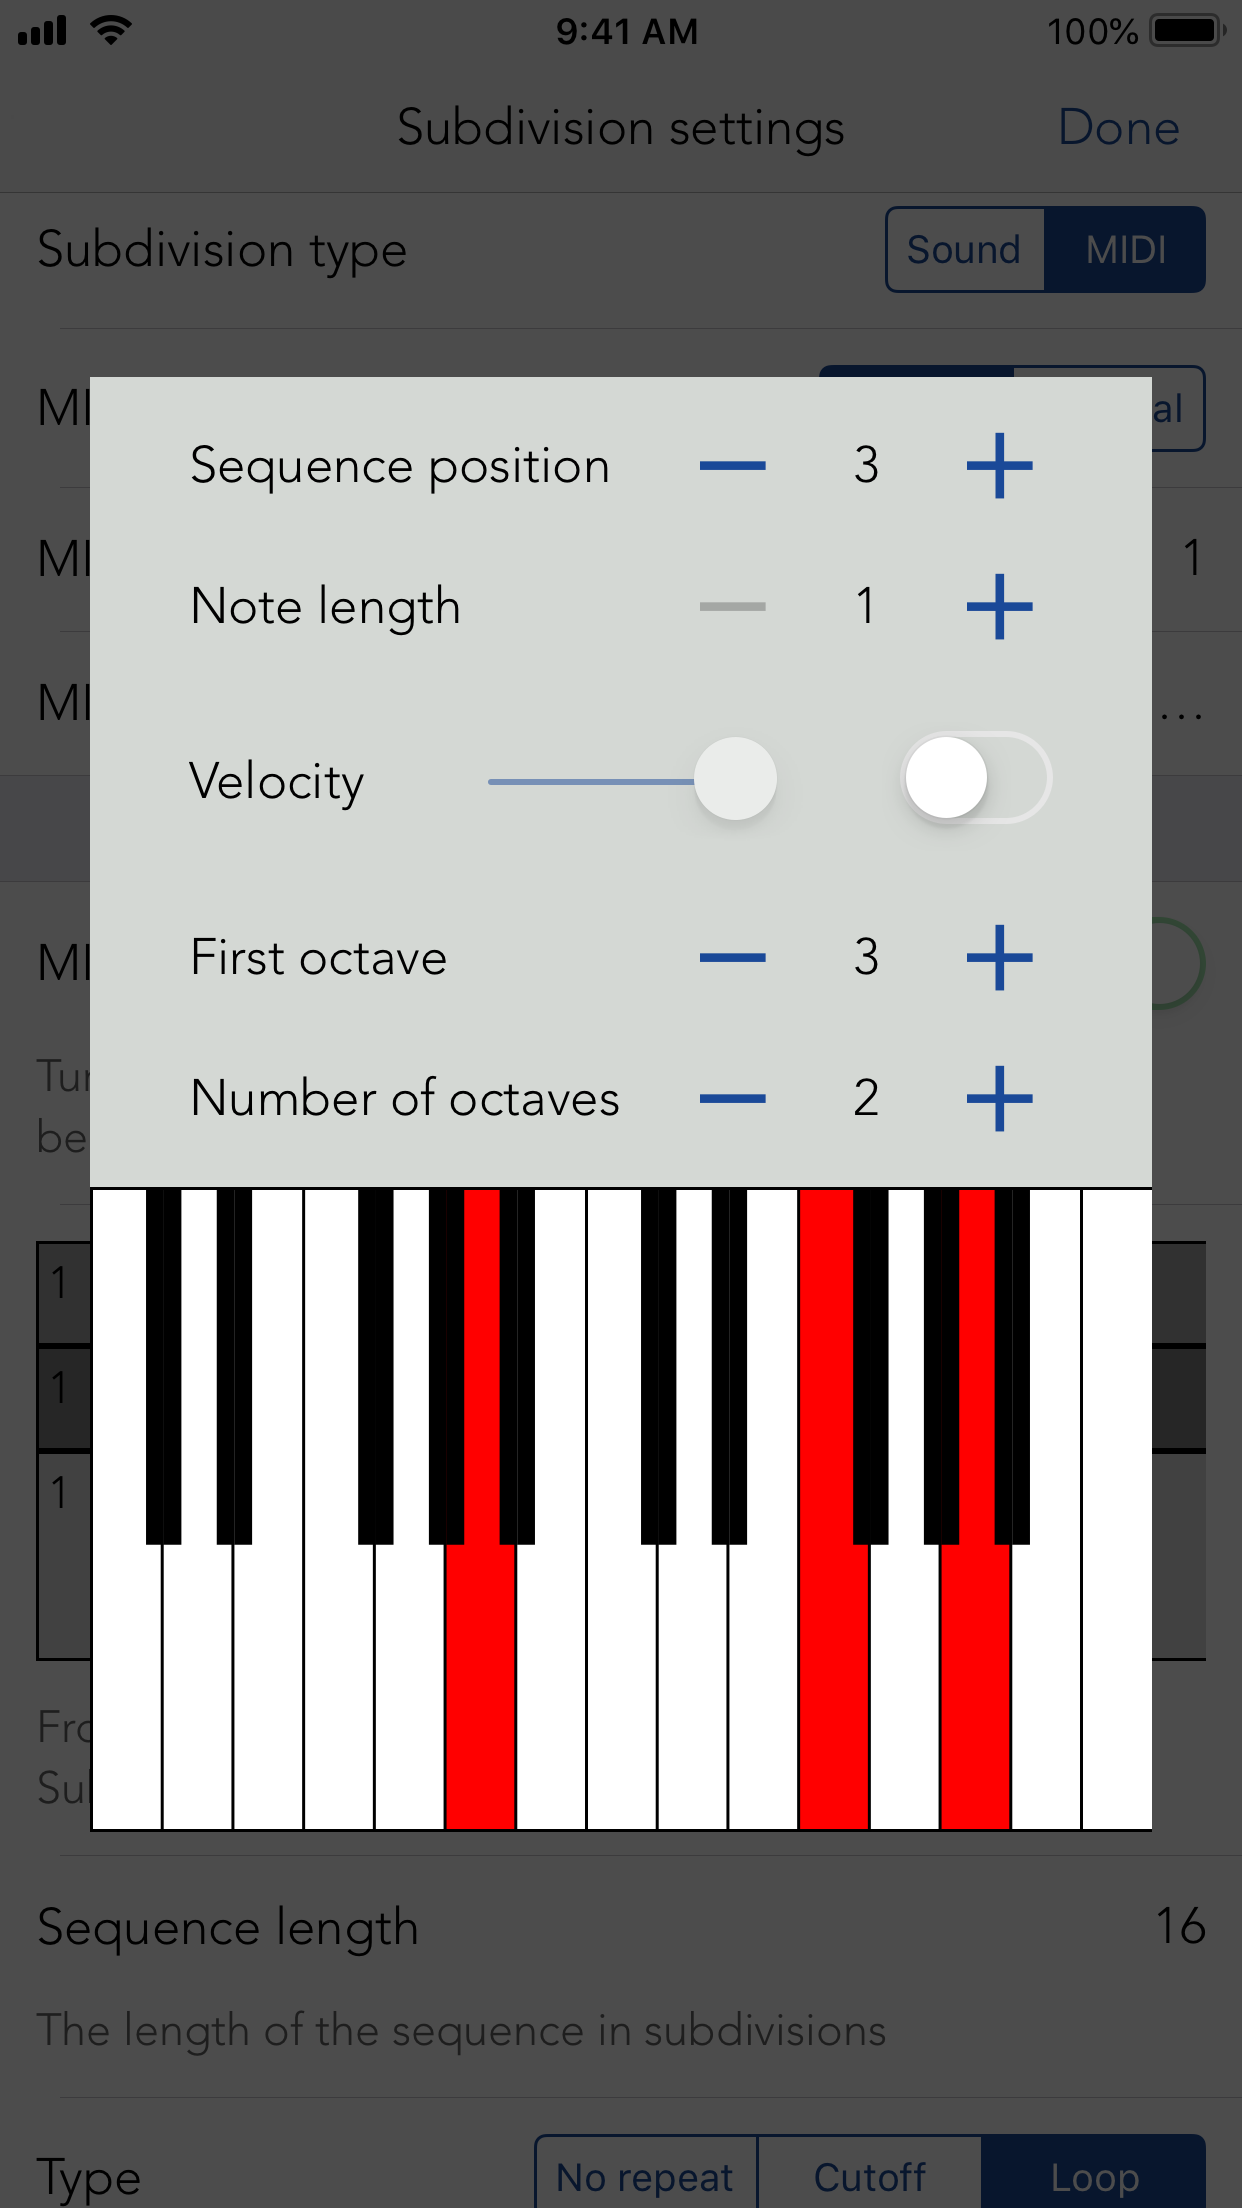
- Sequence position: use this to move forward and backward through the pattern rather than having to open
and close the MIDI window each time to get to a new position in the sequence.
-
Note length: how many subidivisions the current note should be played for.
-
Velocity: the MIDI velocity sent with the current note. This is off by default and the volume is
instead controlled by the normal subdivision volume controls.
-
First octave: the first octave displayed on the on-screen keyboard.
-
Number of octaves: the number of octaves displayed on the on-screen keyboard.
Using the on-screen keyboard, you can choose which MIDI notes get sent at that point in the sequence.
Multiple notes (chords) can be played simultaneously. Red keys are active and black/white keys are
inactive.
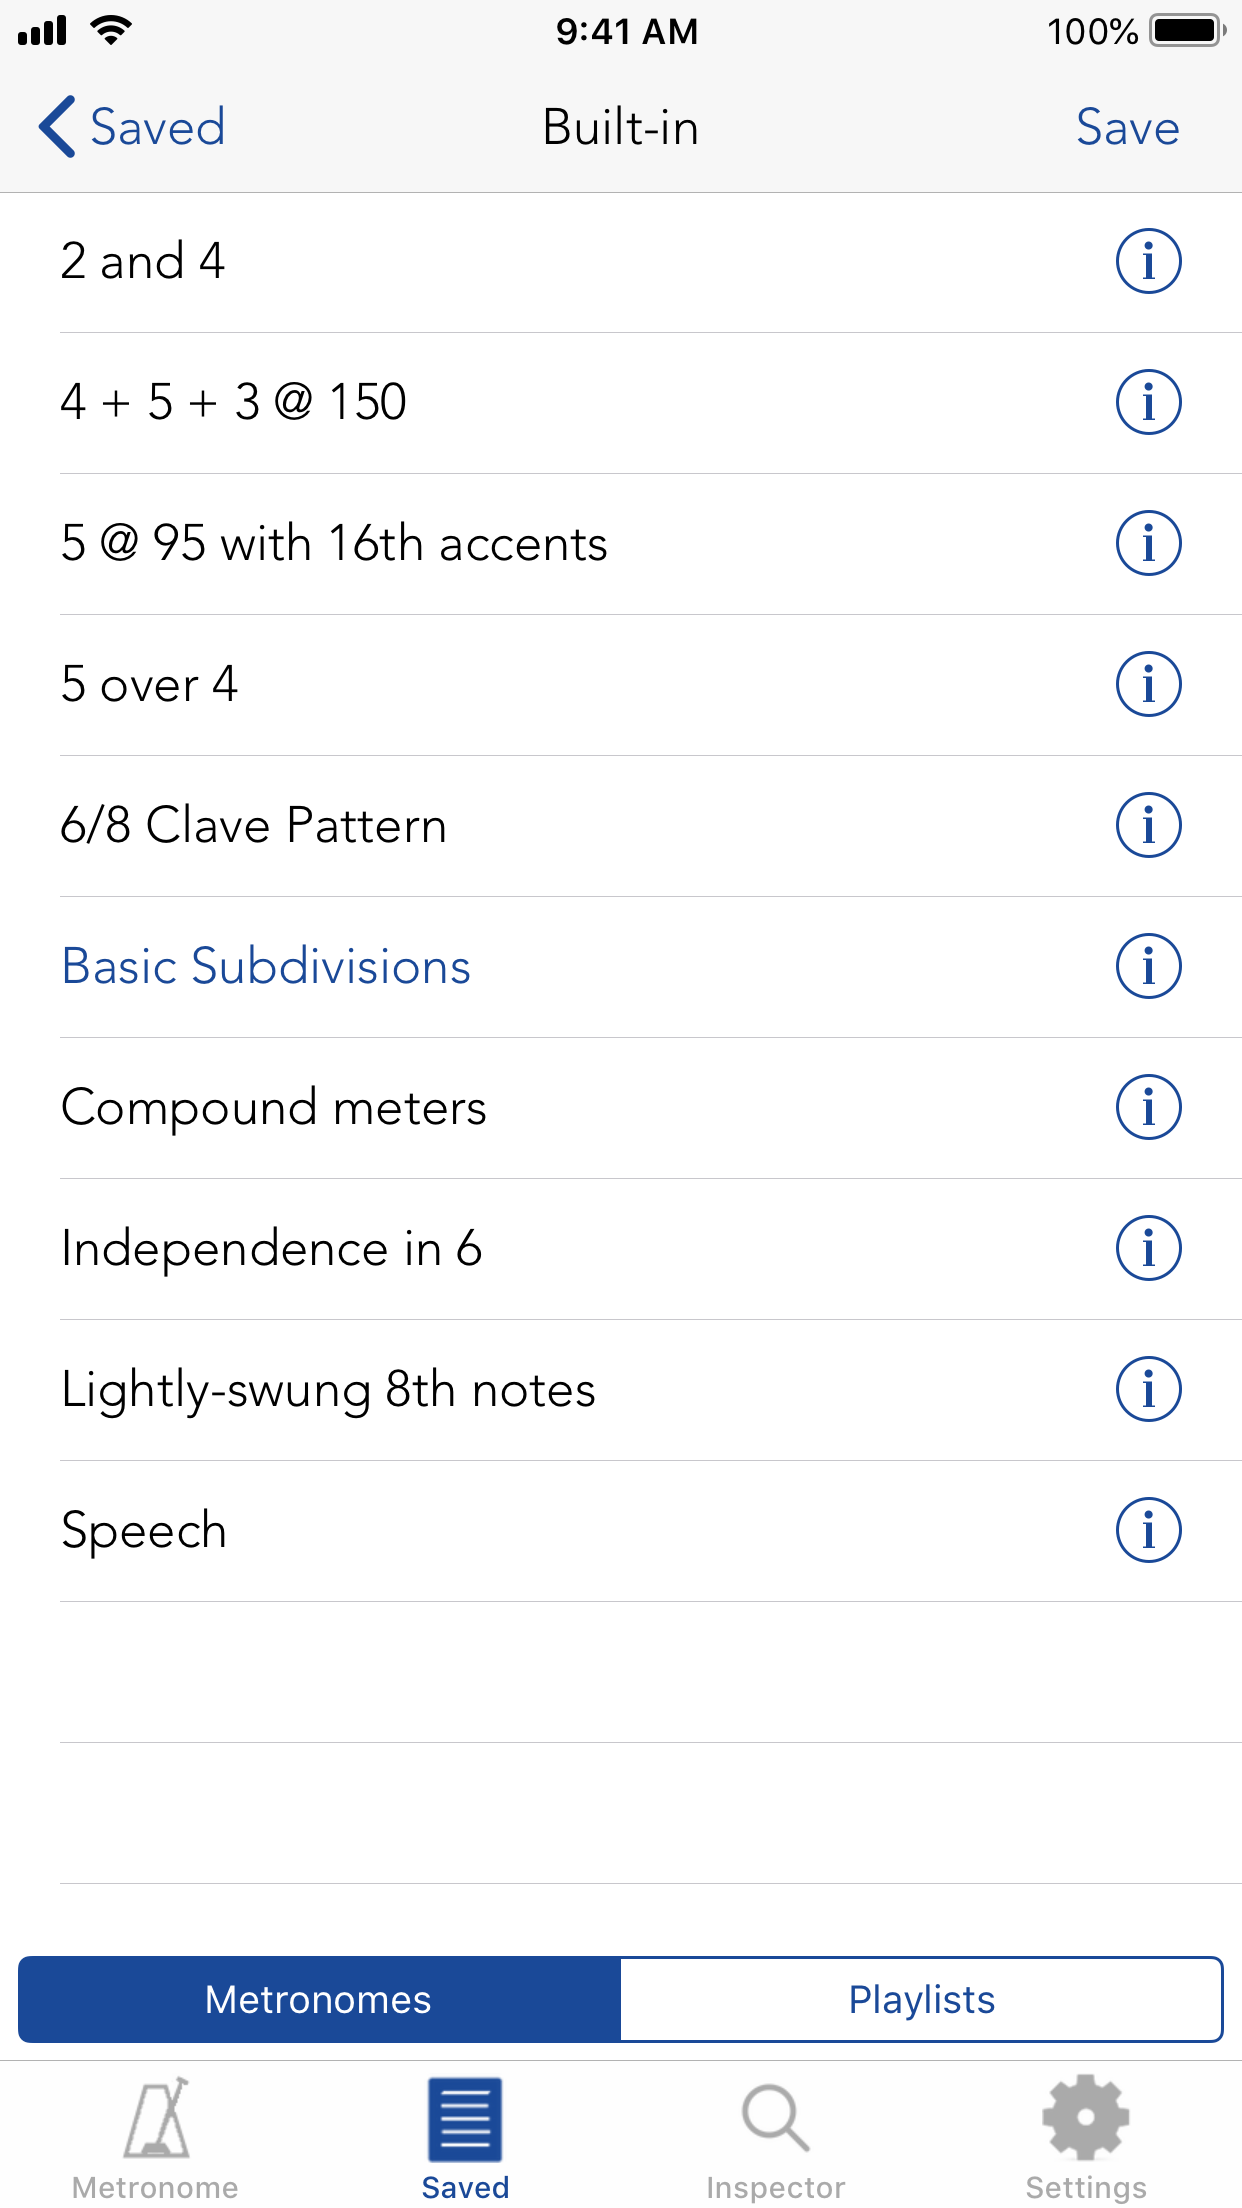
The saved page (found in the bottom tab bar) provides access to the Default metronome, all of the built-in
saved metronomes, your custom saved metronomes, and your playlist collections of metronomes.
The feature you may find yourself using most is the "Default metronome" — this metronome always sits
at the top of the Saved page and will allow you to reset Metronomics to the basic settings of one quarter
note in 4/4 at 120 bpm. This metronome cannot be renamed or deleted.
To save your work, tap the "Save" button in the upper-right corner of the "Saved" page. This button opens a
window that allows you to choose a name and location for the metronome. If you stared with the Default
metronome, the name field will be blank. If you've been modifying another metronome, it will be prefilled
with the metronome's name. If you would like to save your creation as a brand-new metronome, you just need
to enter a new name for the metronome. If you choose a name that has already been chosen, you will be asked
whether you wish to overwrite the existing metronome when saving.
Metronomics supports organizing your metronomes into folders. You can choose either an existing folder or
create a new location. Folders are only one-level deep — multiple levels of nested folders are not
supported. To move a metronome to a different folder, load the metronome and then choose "Save" and choose
a new location for it. Once you have saved it in the new location, you can delete the original metronome.
To delete a metronome, press and hold on the metronome's name. Then, choose "Delete."
To share a metronome, press and hold the metronome. Choose "share."
Metronomics has limited support for building playlists. Metronomics is primarily built as a practice tool,
and thus is not necessarily geared towards live-performance use cases. However, it does include the ability
to group metronomes together and navigate between them easily.
Playlists can be accessed from the "Saved" screen. Near the bottom of the screen, there is a segmented
control with two options: metronomes and playlists. Choose "playlists."
To create a new playlist, tap the "Add" button in the top right corner of the screen. You will be prompted
for a name for the new playlist.
To delete a playlist, press and hold the playlist name. Then, choose "Delete."
Tap on a playlist to open it and see the list of included metronomes. To add a new item, tap the "+" button
in the top right corner of the screen. This will open a list of currently-saved metronomes. If the
metronome is in a folder, it will be listed as "folder_name/metronome_name".
To reorder the items, tap the "Edit" button in the top right corner of the screen. Once in edit mode, you
can reorder metronomes by dragging them.
To start playing the metronomes on the playlist, you can use the built-in start/stop button on the playlist
screen. You can also use the large up and down arrows to navigate between metronomes. Finally, you can use
the on-screen volume control on this screen if you wish to quickly turn up or mute the metronome.
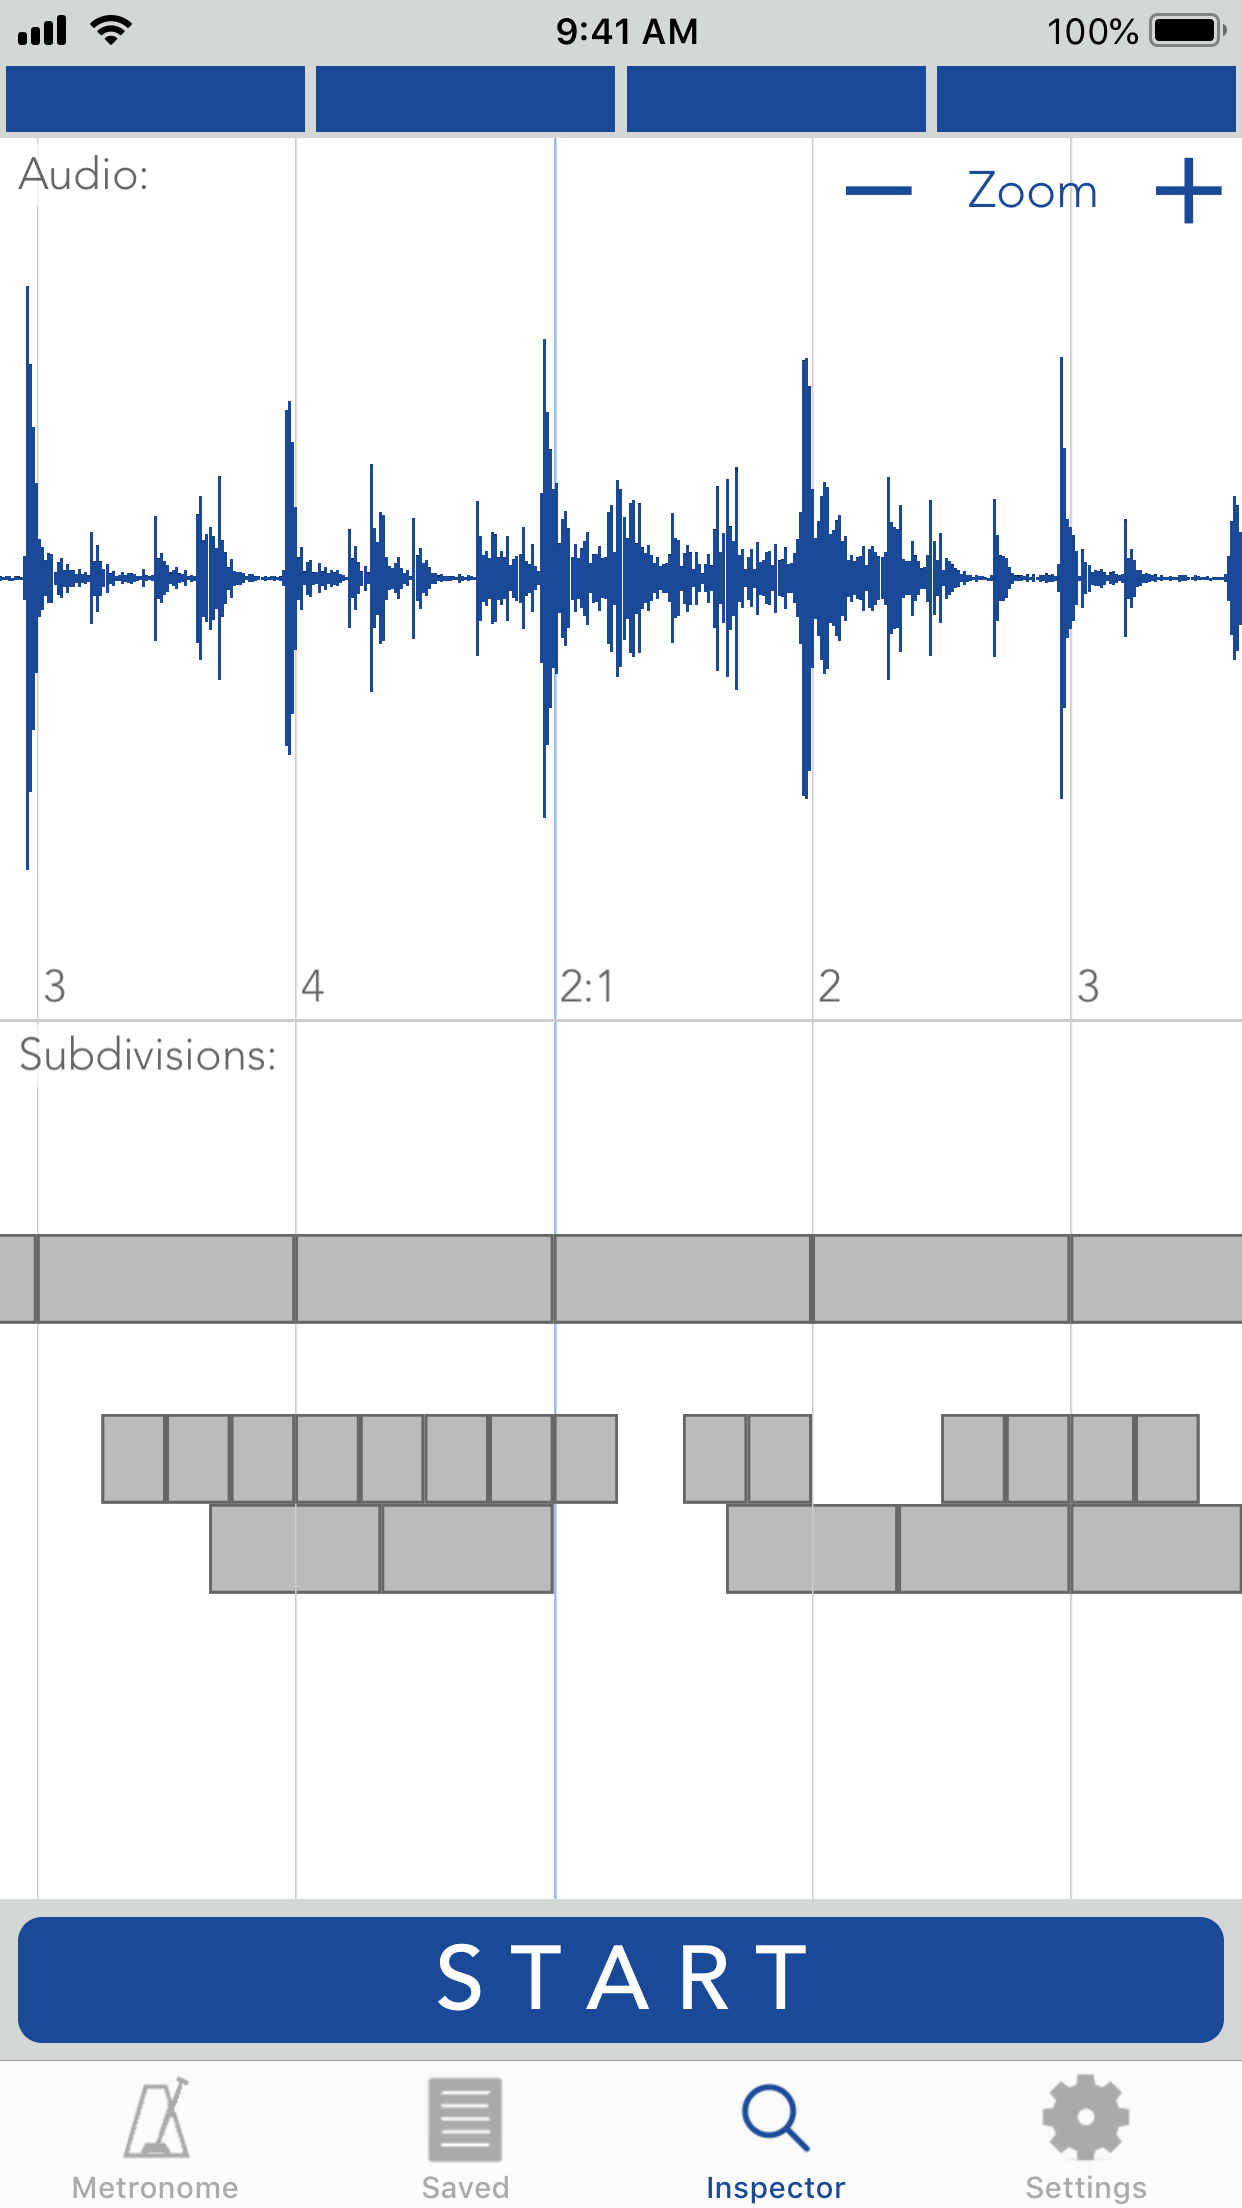
If you have a Metronomics Pro subscription, you have access to "Insector mode." In this mode, Metronomics
will display audio data from the microphone on your device along with a graph of the subdivision that
Metronomics plays. Using this visual data, you can attempt to see how in time you are playing.
To use Inspector mode, you must start the metronome from the Inspector page. Otherwise, the microphone input
will not be captured.
If "show peak lines" on the Settings screen is enabled, after the metronome is stopped, Metronomics will
analyze the microphone input and draw red lines on the screen where it finds peaks at the beginnings of
notes. You can use this as another tool to guage how in-time your playing is. Keep in mind that this is an
imperfect technology and works significantly better with some instruments than others.
Help:
Opens this manual
About:
Opens the "About" screen for Metronomics. This page includes the version number, which can be helpful
during support requests.
Walkthrough:
Opens the walkthrough that is displayed when Metronomics launches for the first time.
Upgrade/subscription:
"Upgrade" brings you to a screen that shows information regarding upgrading to Metronomics Pro. Once you
have upgraded, this link changes to "Subscription" which allows you to manage your Metronomics Pro
subscription.
Ableton Link:
Opens the Ableton Link preference screen, which allows you to enable Ableton Link, which is used to sync
music apps together.
Usage:
Displays your usage of Metronomics over time.
Theme:
switches between light/dark displays for Metronomics (only available in Metronomics Pro).
Disable auto-lock:
Disabling auto-lock prevents the screen from darkening or turning off
Play in background:
When on, Metronomics will continue to play even if the app is in the background. If the metronome is not
playing, it will not consume any battery even if this mode is enabled.
Mix with other audio:
Allow Metronomics to mix with other audio sources (note: lock screen playback controls will not be
available if this is enabled)
Haptic feedback:
Enables haptic feecback for the main screen control row.
Show downbeat:
Show a slider/button for the downbeat on the main screen.
Downbeat settings:
Open the subdivision settings for the downbeat.
Auto-add 'Every beat':
When on, a special 'Every beat' subdivision is automatically added when changing the time signature to
something including a denominator other than 4
Sliders:
Controls whether the sliders on the main screen control volume or probability. The knob below will do the
opposite.
Show peak lines:
Show peak lines on Inspector screen once the metronome is stopped.
Peak factor:
The multiplication factor that determines a peak. Lower values will tend to find more peaks.
Export metronomes:
Exports a package of all of the saved metronomes in one bundle. Useful for backups.
Export audio:
Exports an audio file from the current metronome. Time can be chosen in either minutes/seconds or measures.
(Only available in Metronomics Pro)
Export MIDI:
Exports a MIDI file from the current metronome.
(Only available in Metronomics Pro)
Metronomics includes a number of keyboard shortcuts including:
- Spacebar — start/stop metronome
- -/+ keys — tempo +/- 1 bpm
- Up/down arrow keys — tempo +/- 5 bpm
- t — tap tempo
- Command-t — open tempo entry
- 1-9 keys — change time signature to _/4
Metronomics has the ability to run as a an AUv3 audio unit inside of a host application. This can be useful
for running Metronomics alongside or synced with synthesizers and other audio applications (sync requires Ableton Link).
Consult the manual for your host of choice for how to add Metronomics. Metronomics is a "generator" type
AUv3 and does not play repsonding to MIDI events, so it may not appear in some hosts (GarageBand for
instance). However, other hosts such as AUM are fully
compatible with Metronomics.
When a Metronomics AUv3 is opened, by default it opens to the last state of the full application version.
Settings can be changed independently within the AUv3 including loading different saved metronomes.
Multiple instances of the Metronomics AUv3 can be run at the same time.
The Settings screen is not available from the AUv3 and must be viewed in the full application. However, the
bottom tab bar does include access to the Ableton Link settings within the AUv3.
If you have an Apple Watch, you can use it as a remote to control Metronomics on your iOS device. To use
it, open Metronomics on both your watch and iOS device. You can control many of the basic features of the
app including start/stop, tempo, time signature, audibility, etc.
The tempo can be adjusted not only with the +/- buttons on the main screen, but also via the watch crown.
Note that if the watch app is opened and Metronomics hasn't been opened for a while on your iOS device, it
may not respond to start/stop messages until you open Metronomics on your iOS device.
Metronomics Pro enables a number of additional features including:
-
Custom subdivision sounds
-
iCloud sync of metronomes and playlists
-
MIDI subdivisions
-
Custom time signature denominators
-
Inspector mode
- Wheel view
- Grid view
-
Audio export
-
MIDI export
Each of these features is detailed in a separate section of the manual except for custom subdivision
sounds. Once enabled, custom subdivision sounds are available by loading additional audio files into
Metronomics.
Audio files of the following types are accepted for import: wav, mp3, mp4, aiff. Open any of these types in
Metronomics and they will be automatically imported. For example, if you have an mp3 file attached to an
email, hold down on the attached file and choose Open In... Metronomics.
Once imported, the custom sounds will be available at the top of the list of sounds for each subdivision.
Tap the Upgrade link on the Settings screen. This will present you with upgrade information including
pricing.
Once subscribed, there will be a "Subscription" link on the Settings screen. Tap this to get access to your
subscription information including the ability to cancel your subscription.
You can visit the Metronomics website at metronomicsapp.com
There are many Metronomics tutorial videos on the Metronomics YouTube
channel.
If you have questions or comments that aren't answered here, please get in contact via email at info@metronomicsapp.com.
Support emails will be answered as quickly as possible when the creator has an internet connection (not
always the case when on the road...).